Need help installing your SSL? Our experts can do it for you!
On Plesk 12, you’ll have the following security options available:
- Secure website when CSR was generated in Plesk Panel
- Secure website when CSR was generated elsewhere
- Retrieve a Private Key for the SSL export
- Securing the login page and mail services
- Securing webmail service
Once the Certificate is activated, validated and issued, you will need to install it on your webserver.
To install the SSL Certificate, please do the following:
With a CSR generated on Plesk
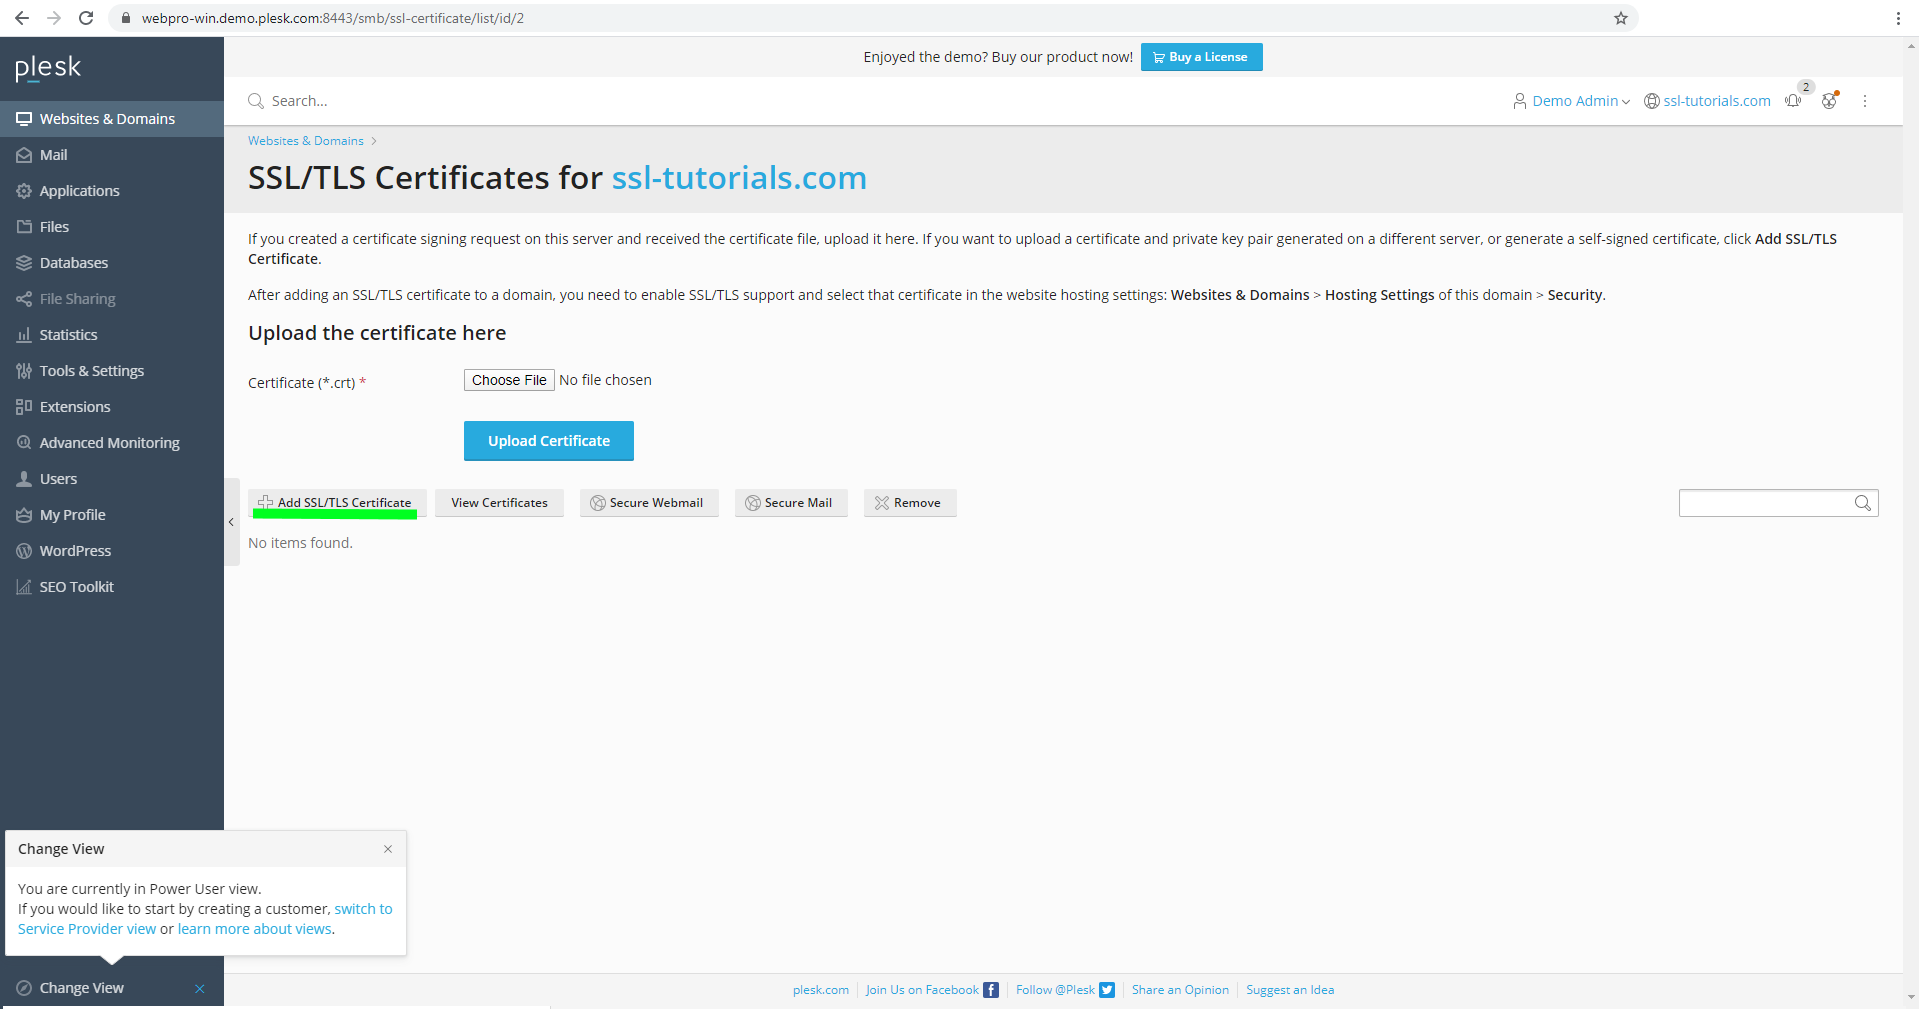
- Log in to your Plesk Panel.
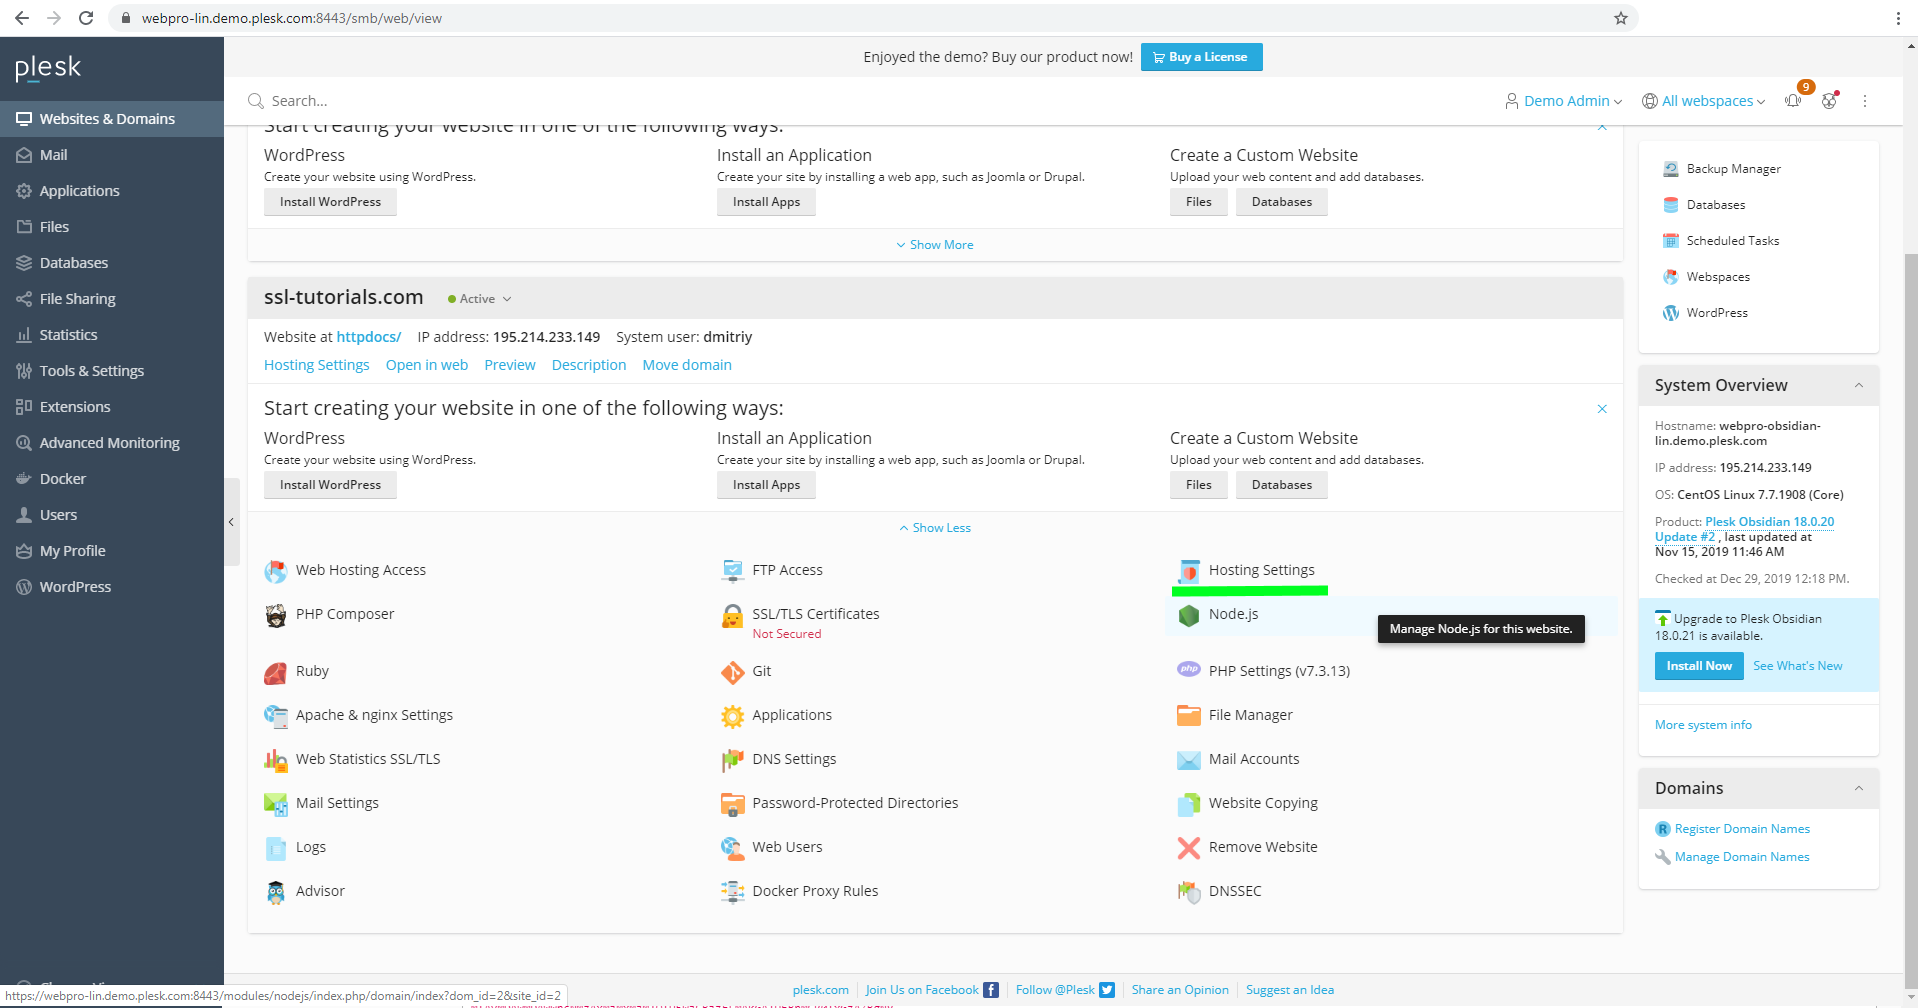
- Select the Websites & Domains tab and click on the domain you need to install an SSL Certificate for.
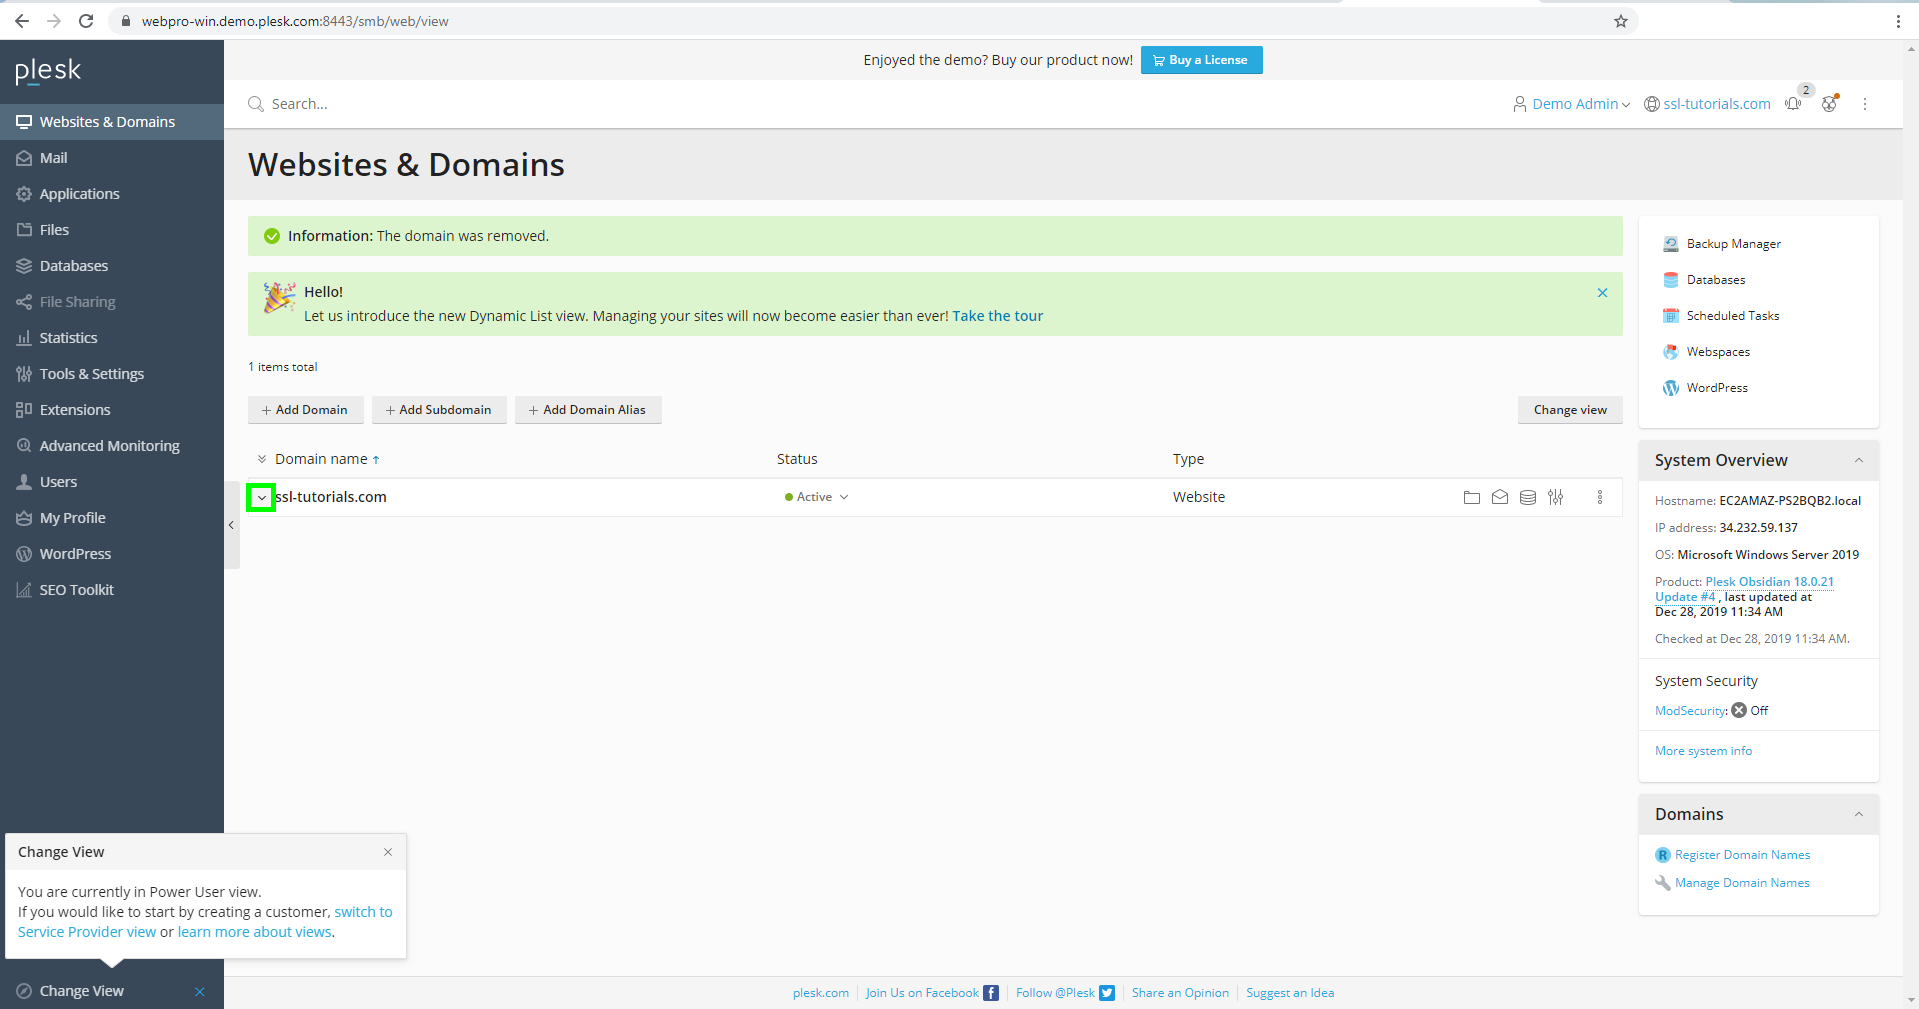
- Choose the SSL/TLS Certificates option in the Security section.
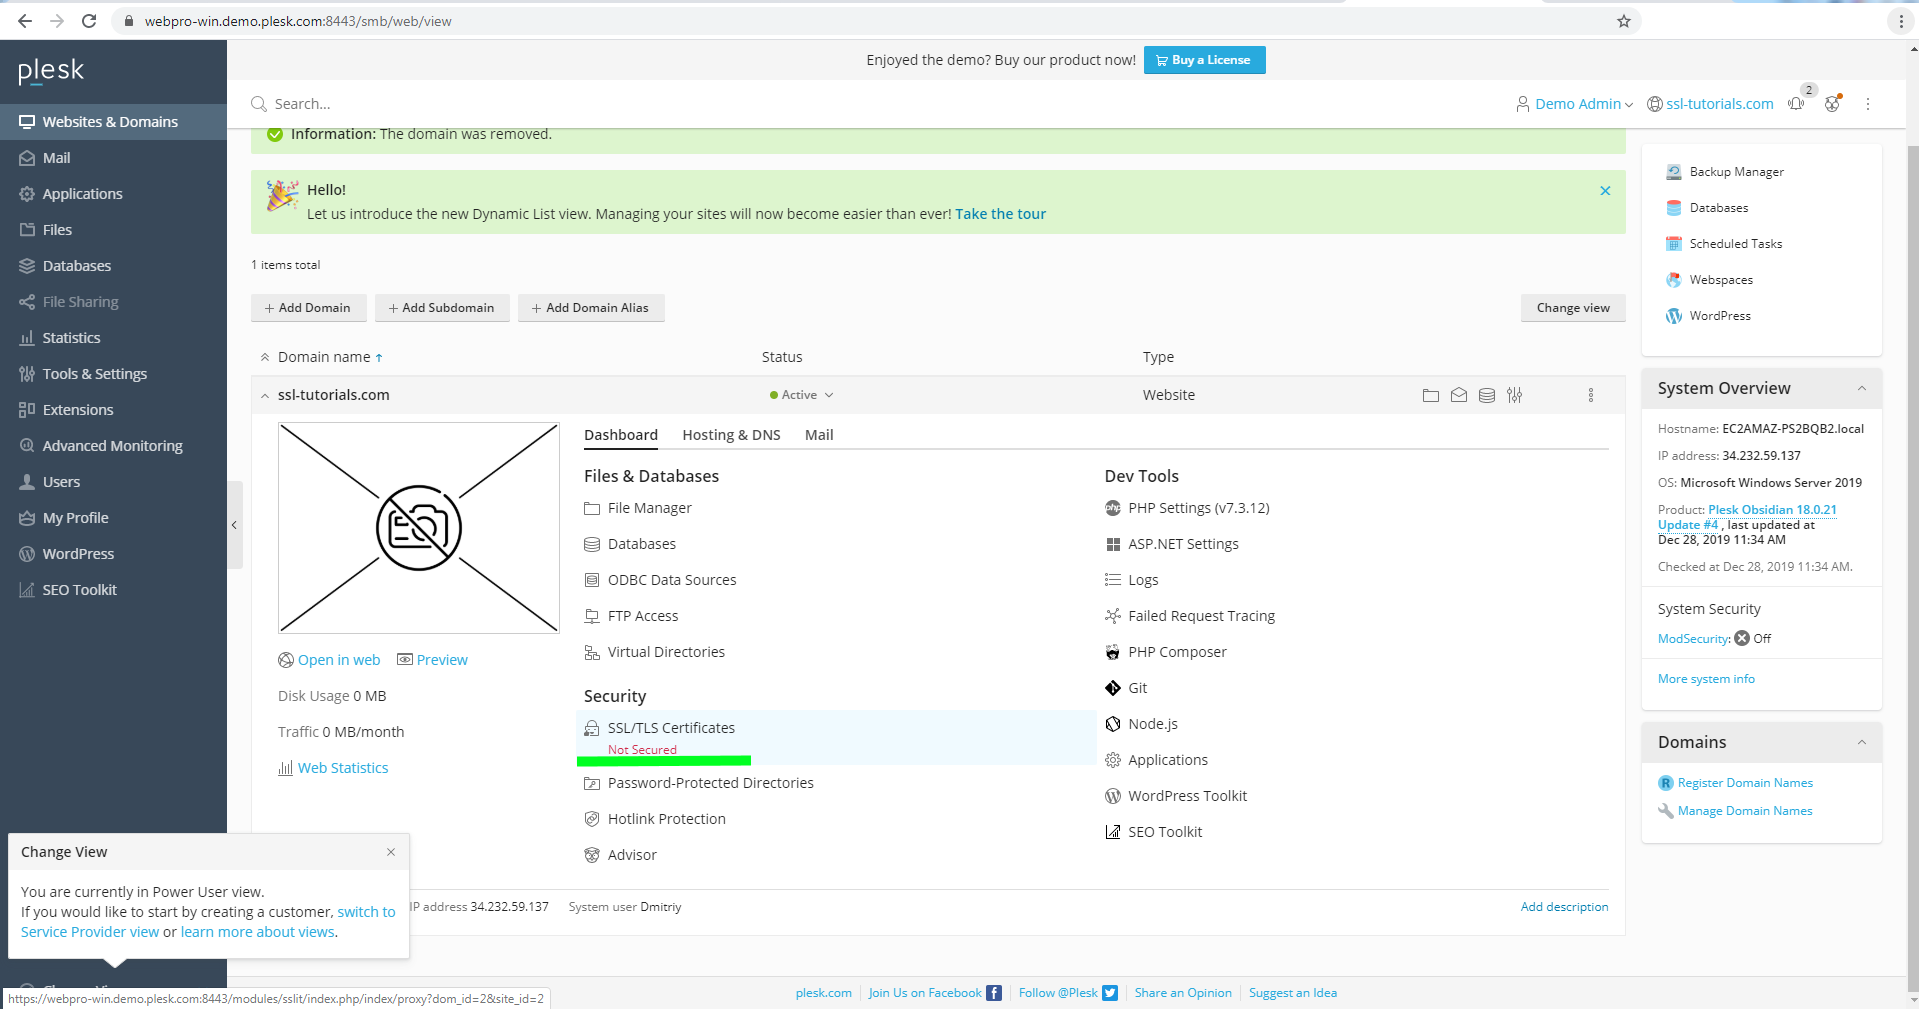 Note: On the older versions of Plesk (up to Plesk 12.5) the corresponding menu option is called “Secure Your Sites” instead of “SSL/TLS Certificates” .
 - Click Advanced Settings on the right side of the page. This will bring you to the SSL setup panel.
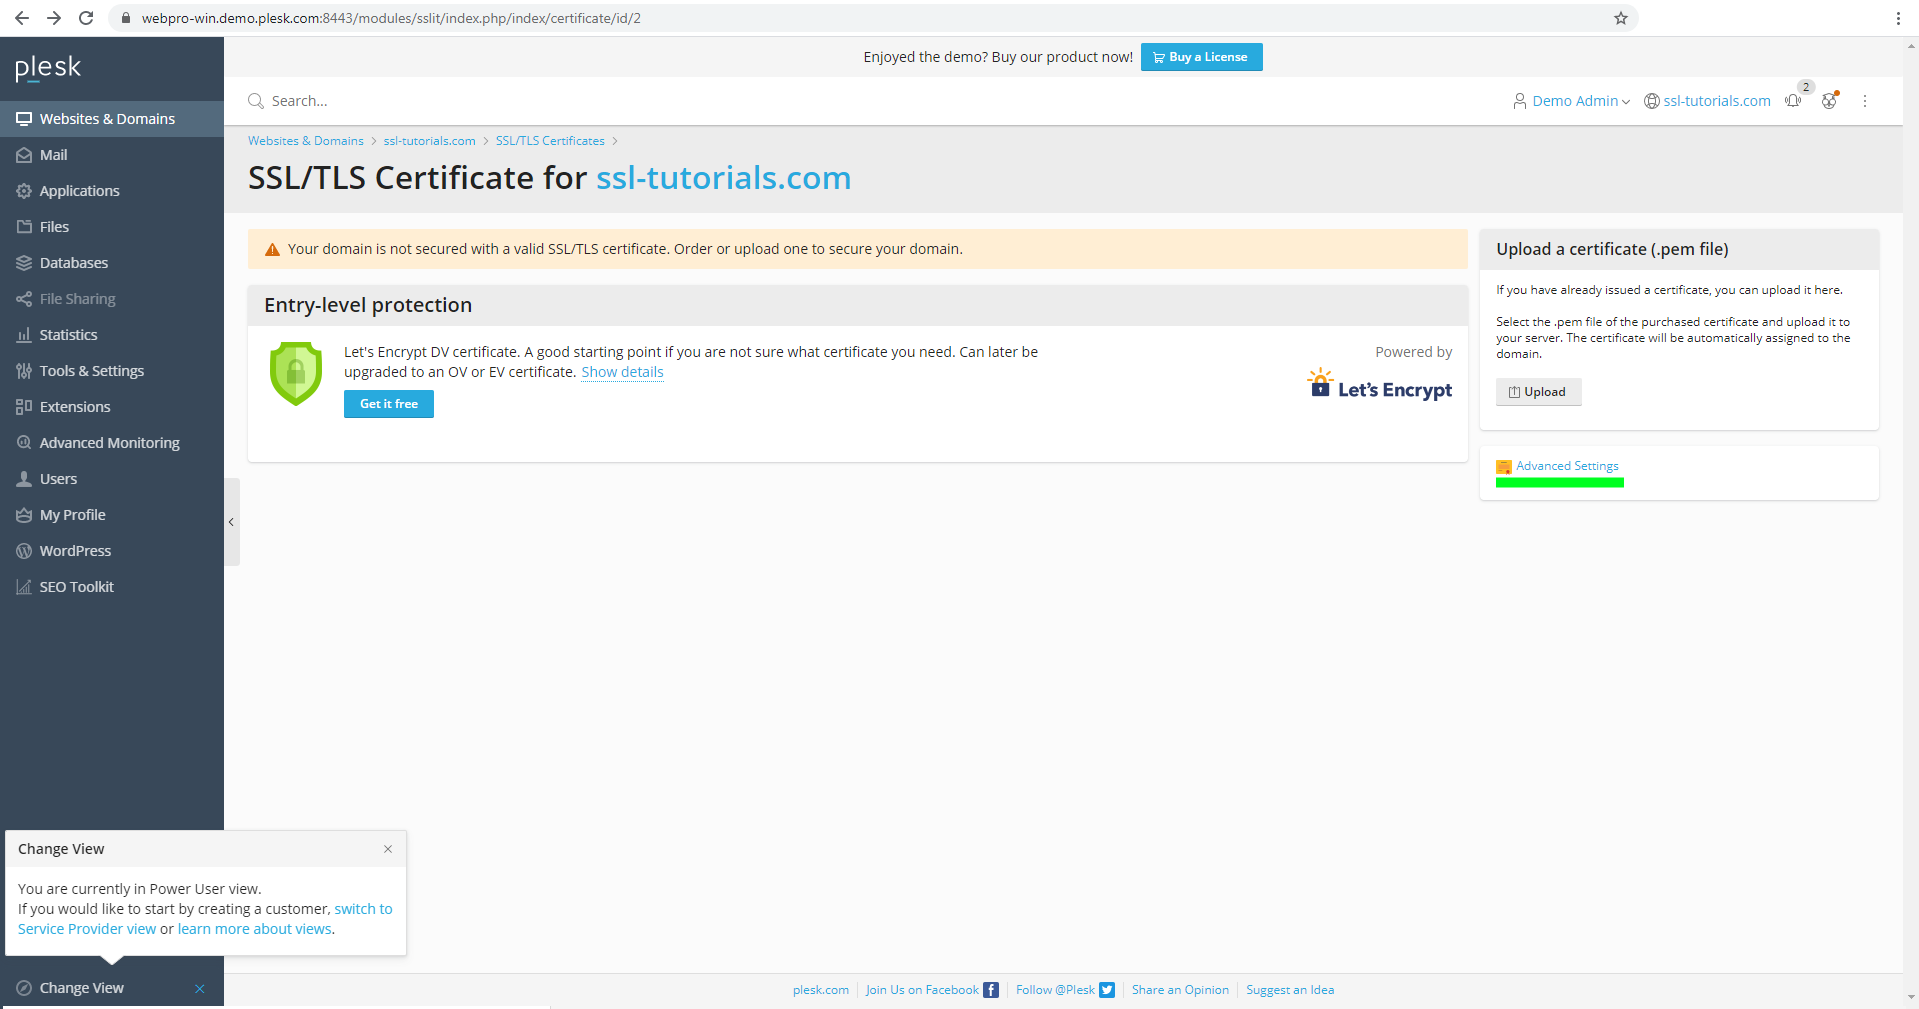
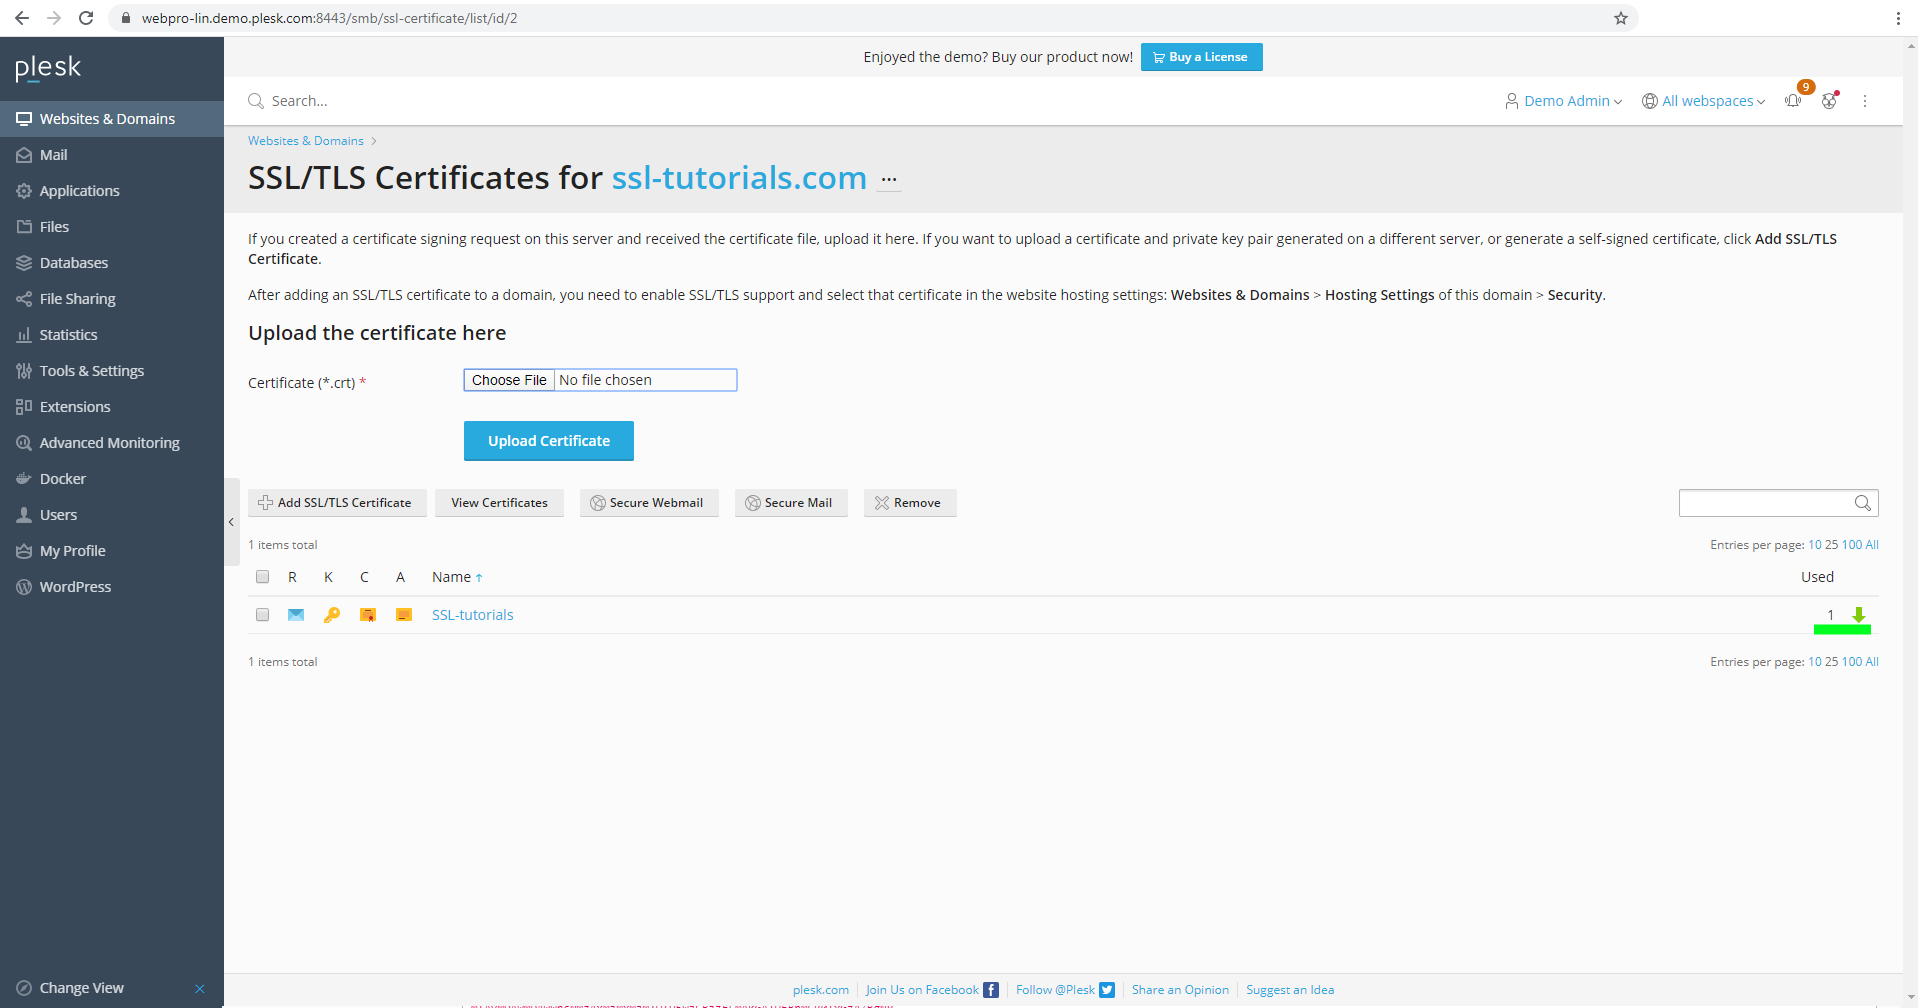
- Select the SSL Certificate entry you created when generating the CSR code for SSL activation:
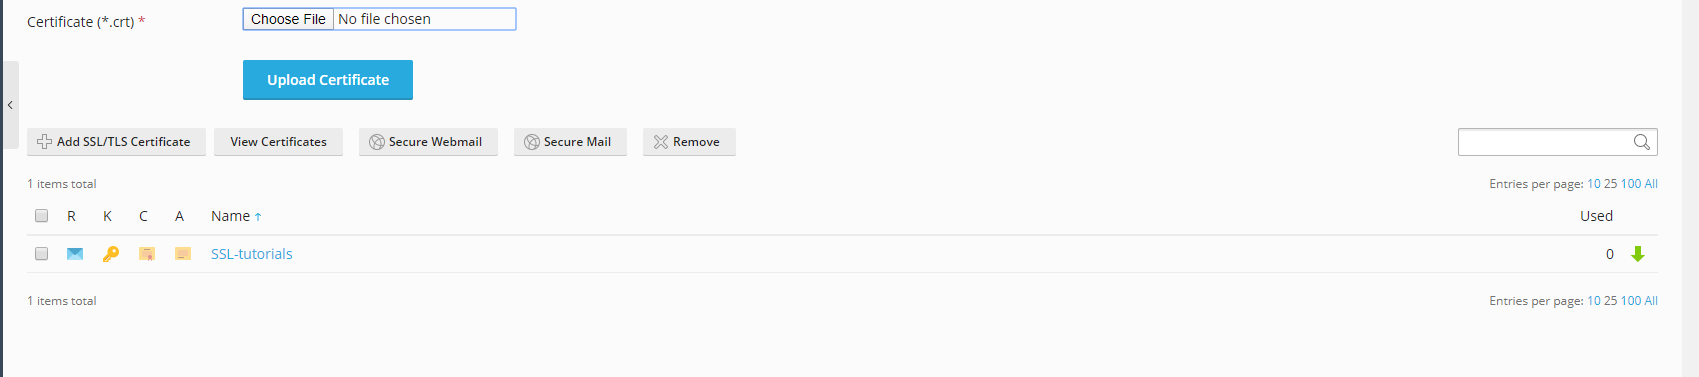
- Upload the Certificate files on this page. Note: The Certificate Authority sends the SSL Certificate files to the administrative contact email address used for the SSL order. The same cert files are also available for download inside your account with us. CA Bundles for your Certificate can also be downloaded here.
- First, upload the end-entity Certificate issued for your domain name where it says Certificate at the top of the page. Click the Choose File button to find the files on your computer.
- Next, click the Choose File button next to CA Certificate to find the chain of intermediate Certificates (CA Bundle) that signs your domain Certificate on your computer.
- After both files are chosen, click the Upload Certificate button.
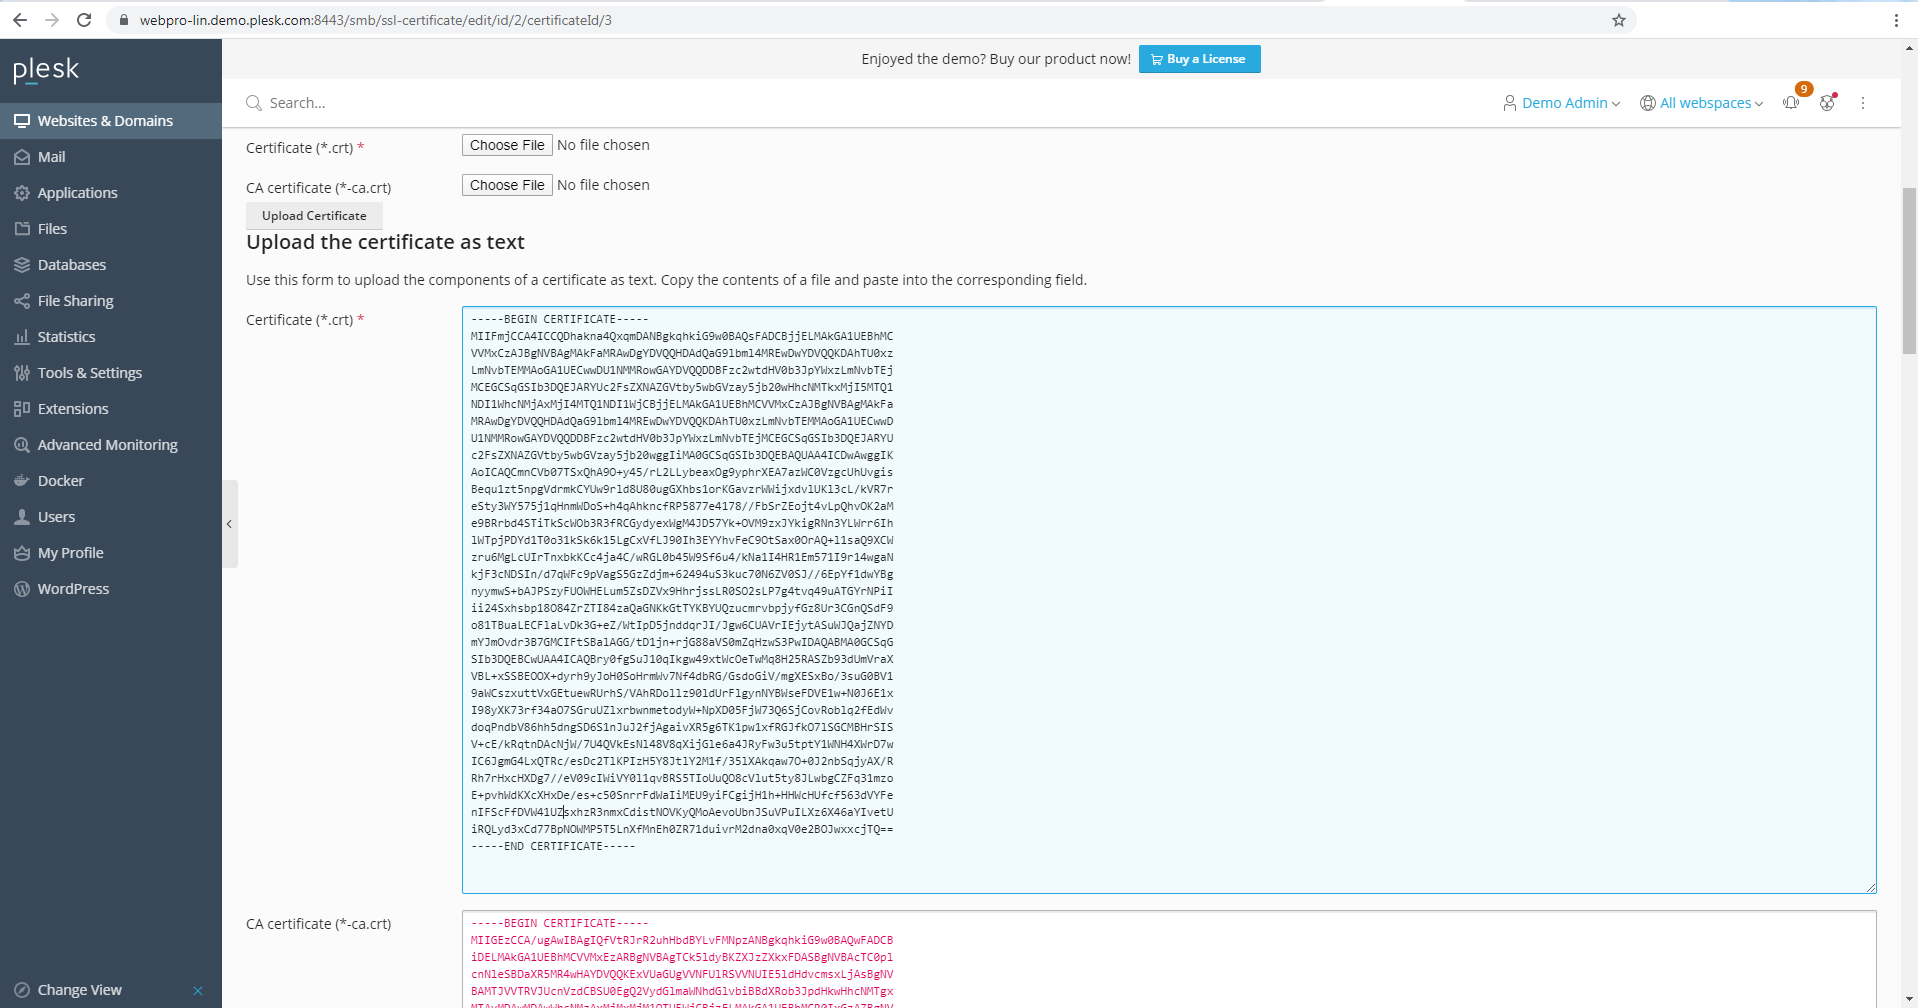
Alternatively, you can open the domain Certificate and the CA bundle files with a text editor, then paste the plain text codes into the corresponding fields on the page and click Upload Certificate.
Note: On the older versions of Plesk (up to Plesk 12.5) the corresponding button is called “Send Text” instead of “Upload Certificate”.
- Go back to the Websites & Domains menu and click on Hosting Settings in the section below the domain name you want to secure.
- Navigate to the Security section on the next page, select the Certificate you want to apply from the drop-down menu and click Apply at the bottom of the page. Note: On the older versions of Plesk (up to Plesk 12.5) you need to click OK instead.Make sure the SSL Support box is checked.
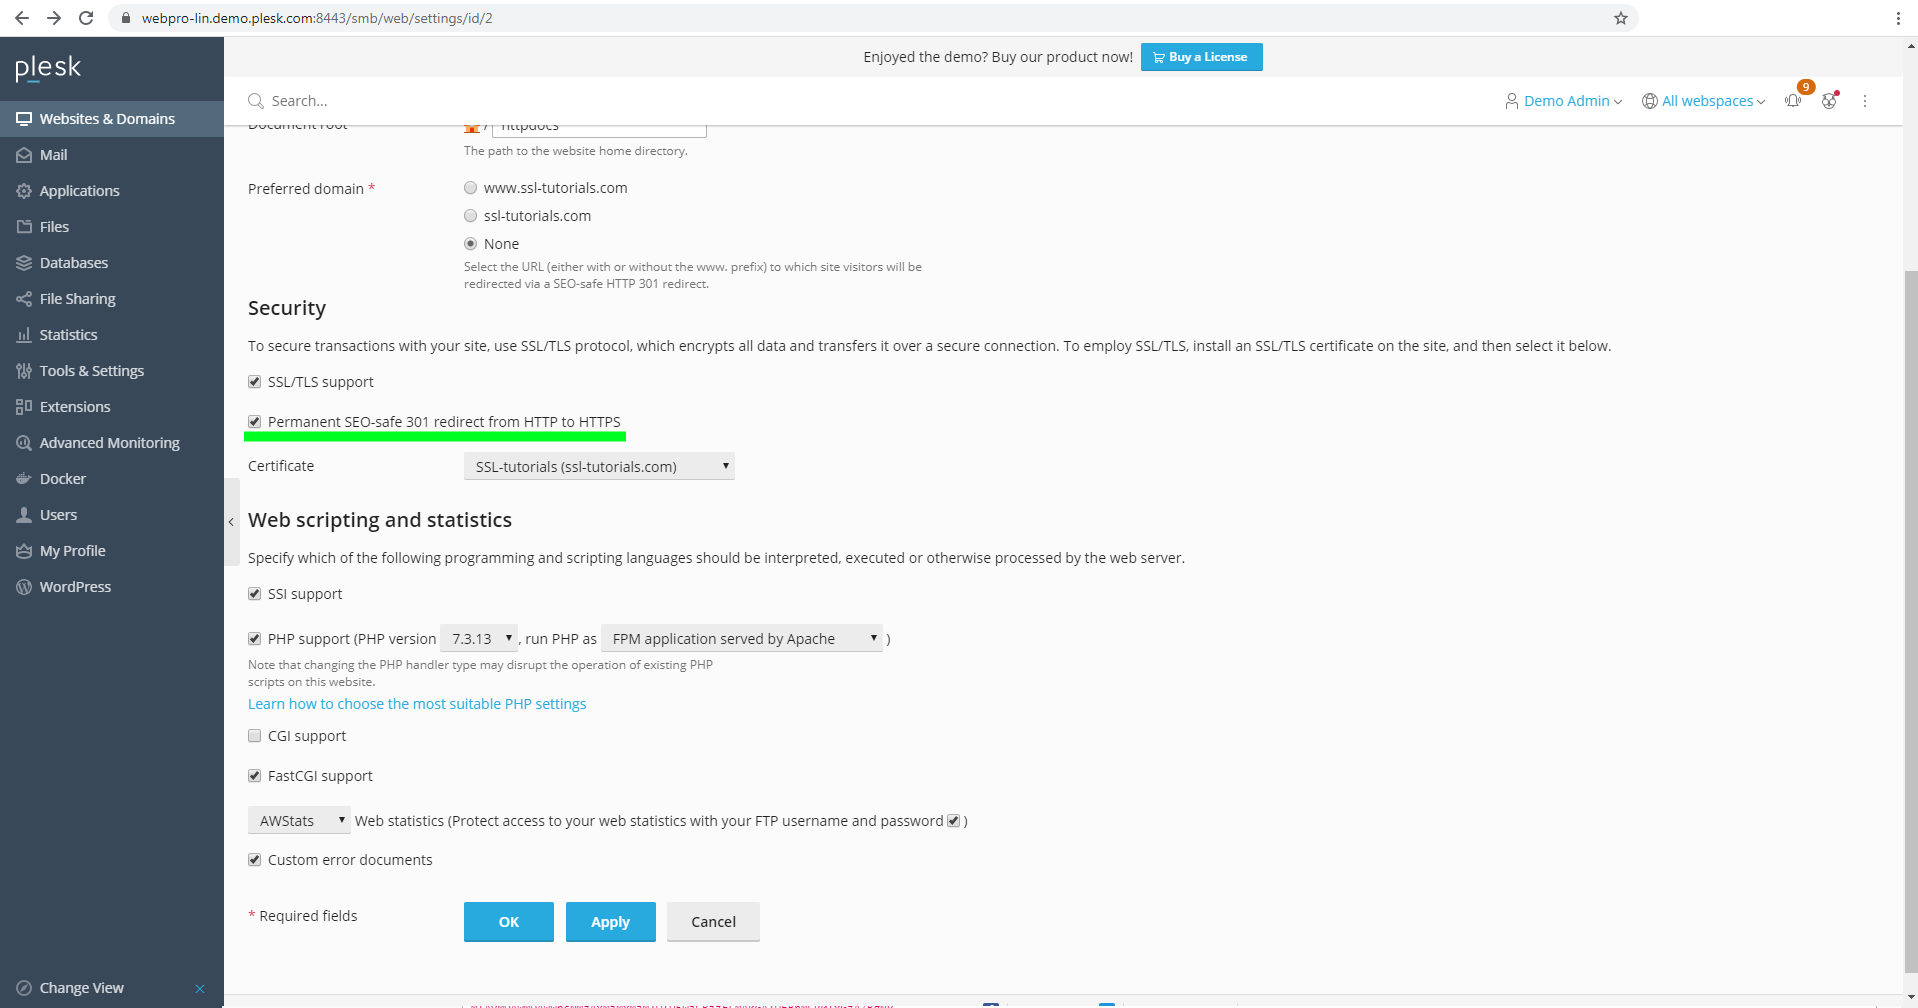 Note: If you want an automated HTTP>HTTPS redirect to be enabled for the website, check the Permanent SEO-safe 301 redirect box too, as shown in the above screenshot.The Certificate is now installed and applied for the website. You can check the installation at https://decoder.link.
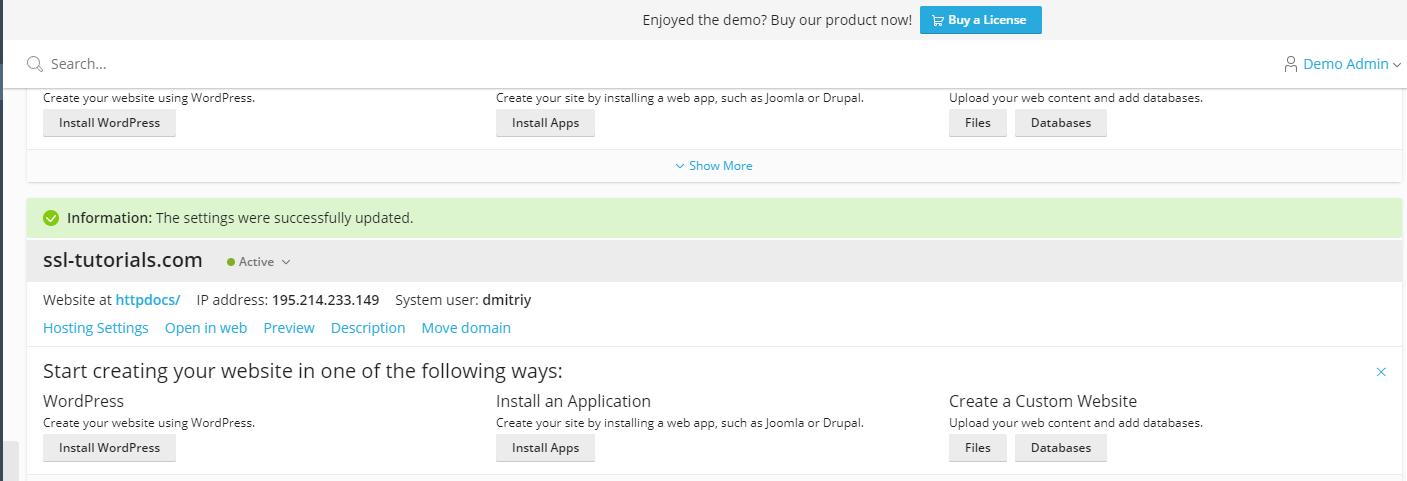
With a CSR generated elsewhere
This method can be used if you are importing an SSl created elsewhere.
This method can also be used if the “Auto-activate” option was used during the SSL activation, and the Private key was generated in-browser and you saved it to your PC.
Steps 1-4 are the same as above.
5. Then, click Add SSL/TLS Certificate to add a new Certificate entry.
6. On the next page, you will be prompted to upload the Certificate files you received from the Certificate Authority via email, as well as the Private key.
Note: You can also download the Certificate along with the bundle in your account with us. CA Bundles for all Certificates can be downloaded here.
- Next to Certificate select the Choose File button to find the Certificate files on your computer. Please upload the domain Certificate issued for your website.
- For CA Certificate, choose the chain of intermediate Certificates (CA Bundle) that signs your domain Certificate.
After both files are chosen, click Upload Certificate.
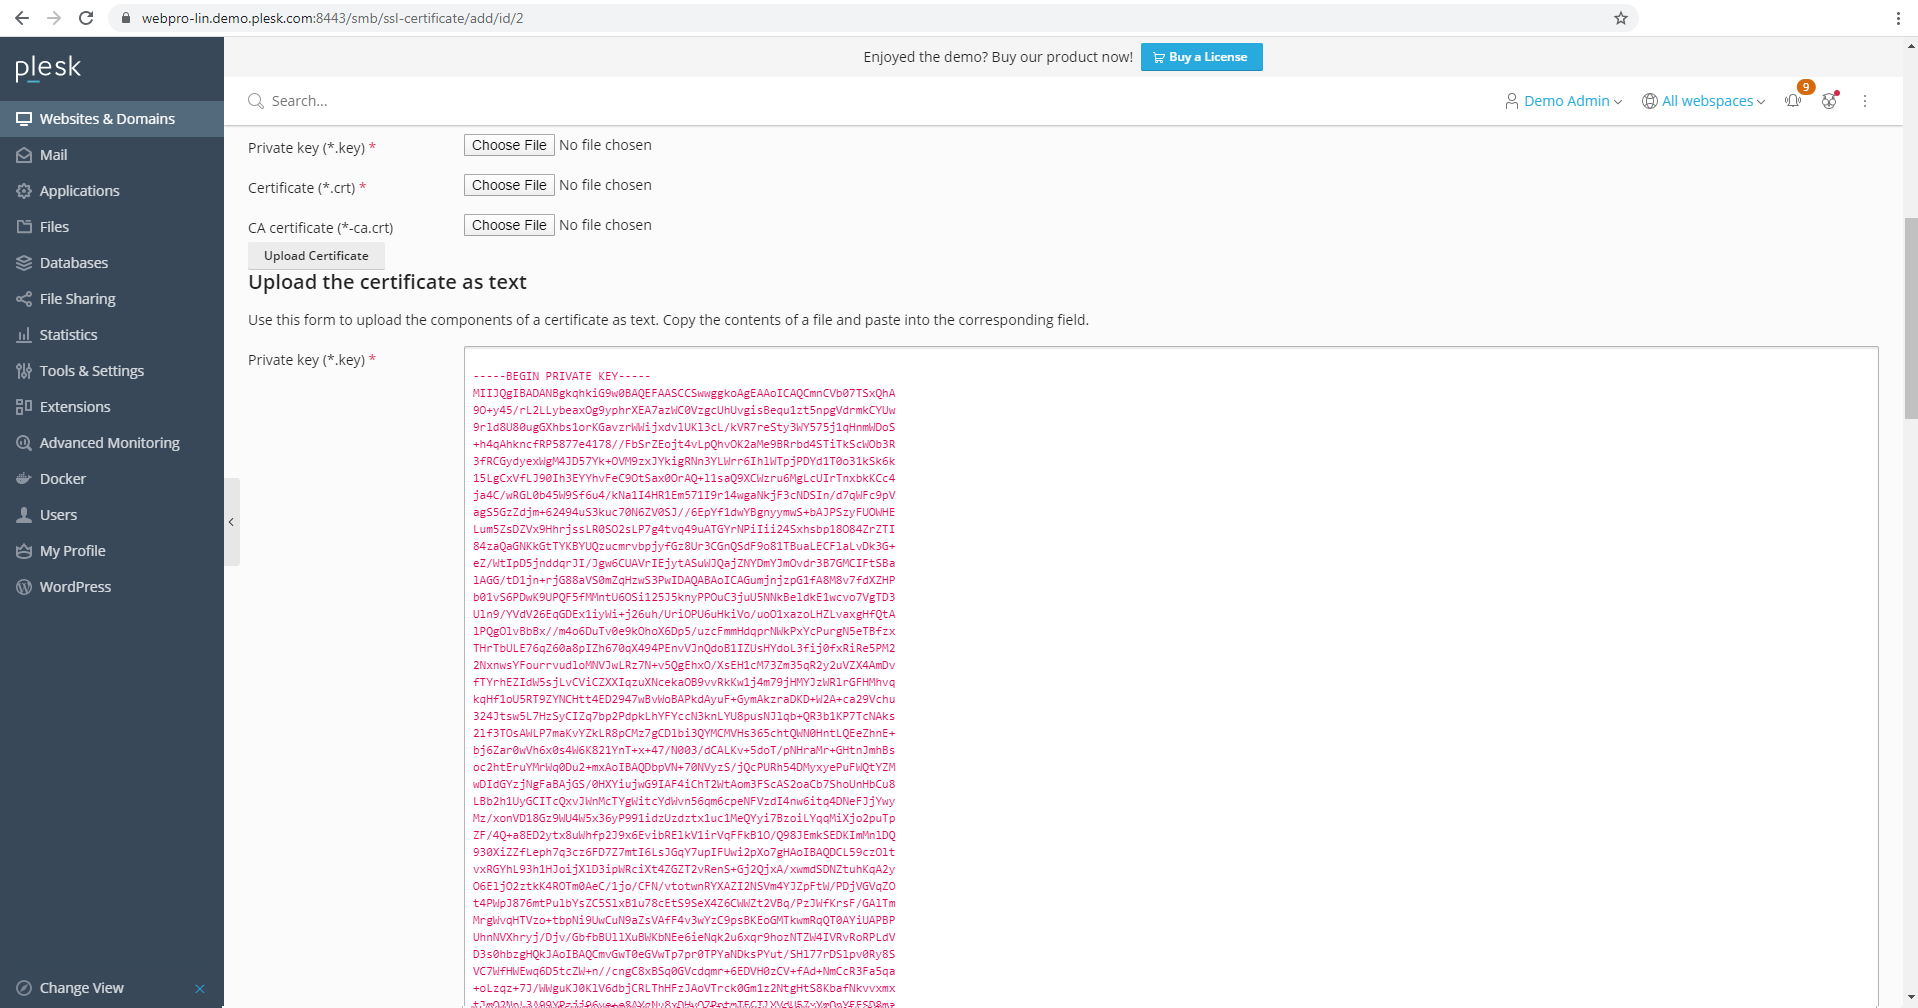
Alternatively, you can paste the domain Certificate (.crt file) and the CA bundle (.ca-bundle file) as plain text codes into the corresponding fields below and click Upload Certificate.
Note: On the older versions of Plesk (up to Plesk 12.5) the corresponding button is called Send Text instead of Upload Certificate.
Steps 7-8 are the same as above.
Retrieve a Private Key for the SSL export
Sometimes the same SSL should be installed on another Plesk panel or application. You may need to do this if, for example, you have a multi-domain type of SSL and the domain names are hosted separately.
In this case, after completing steps 1-5 above, click the green arrow button on the right-hand side of the panel to download the Certificate, CA Certificate and Private key as one combined file.
This file can be opened with any text editor (for example, Notepad/Notepad++ on Windows or TextEdit on Mac).
Install the Certificate on other server using the corresponding guide from this list.
Securing the login page and mail services
To secure the Plesk login page and mail services (SMTP, IMAP, POP3), you will need to log in to your server as Administrator or have administrator privileges first.
Next, go to Tools and Settings and click on SSL/TLS Certificates in the Security section.
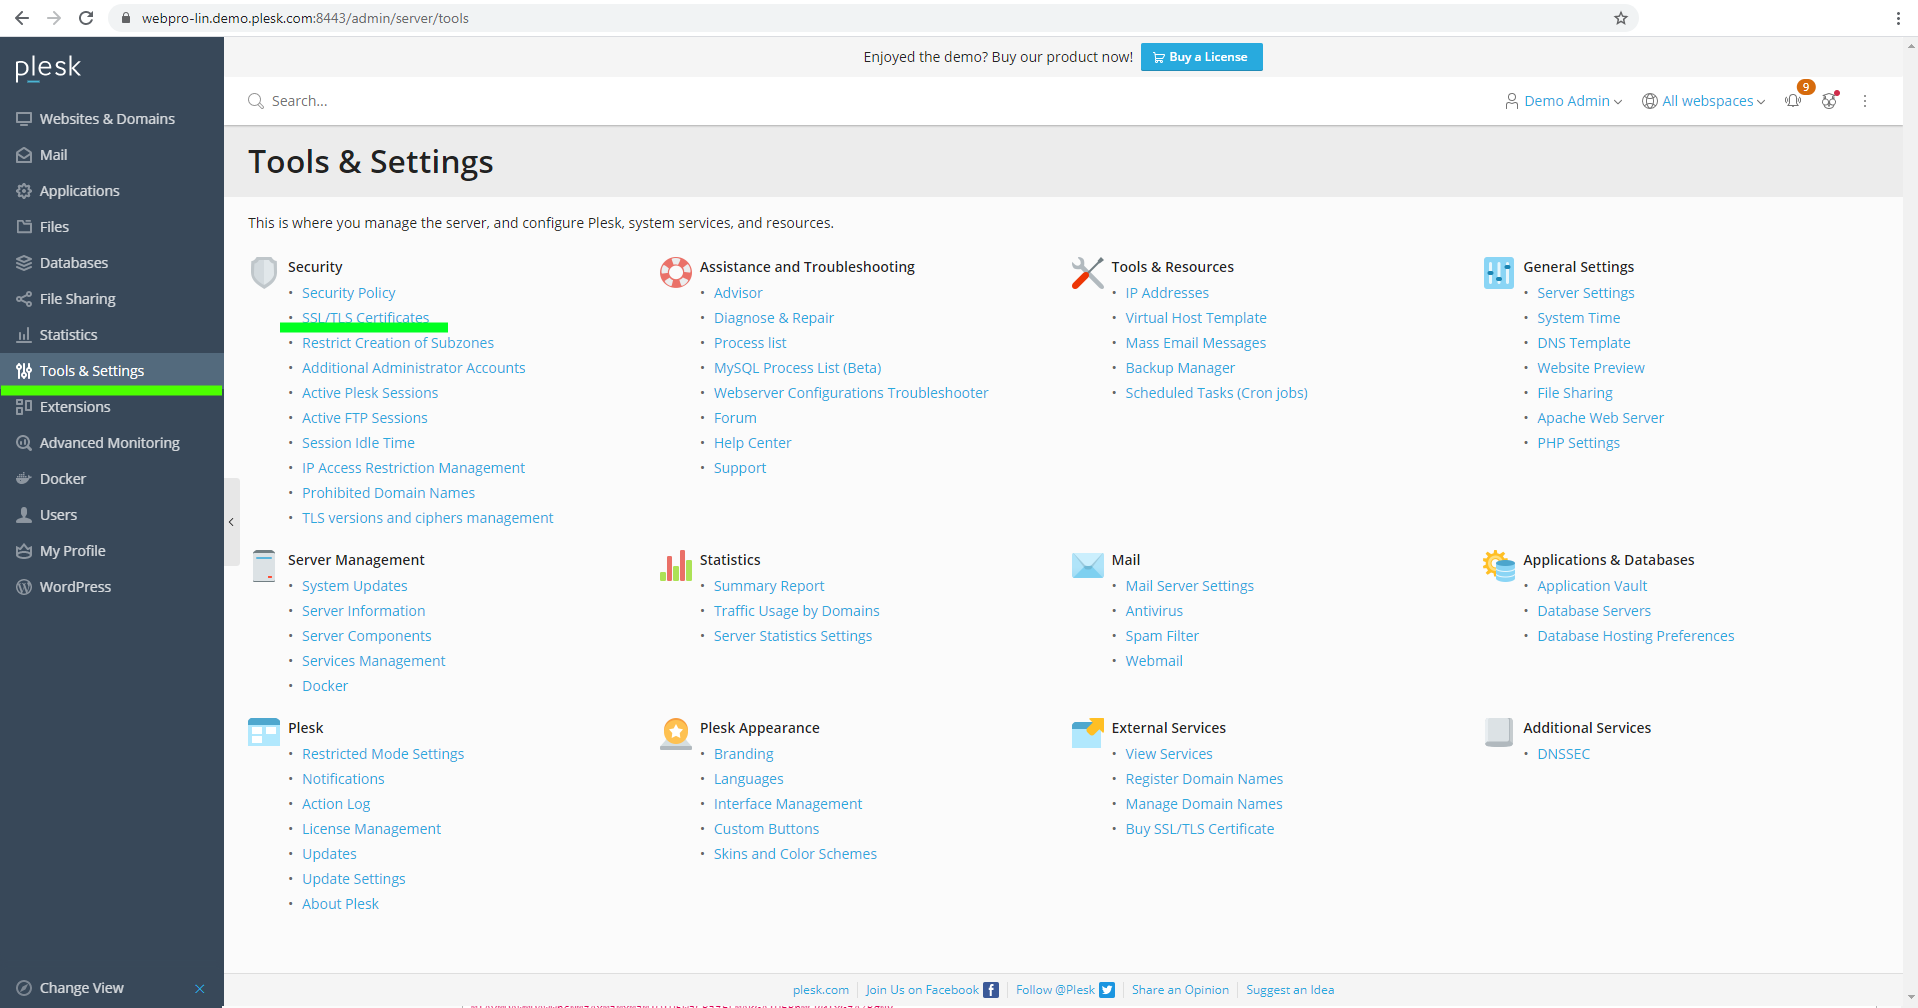
You’ll find two options: Certificate for securing Plesk and Certificate for securing mail.
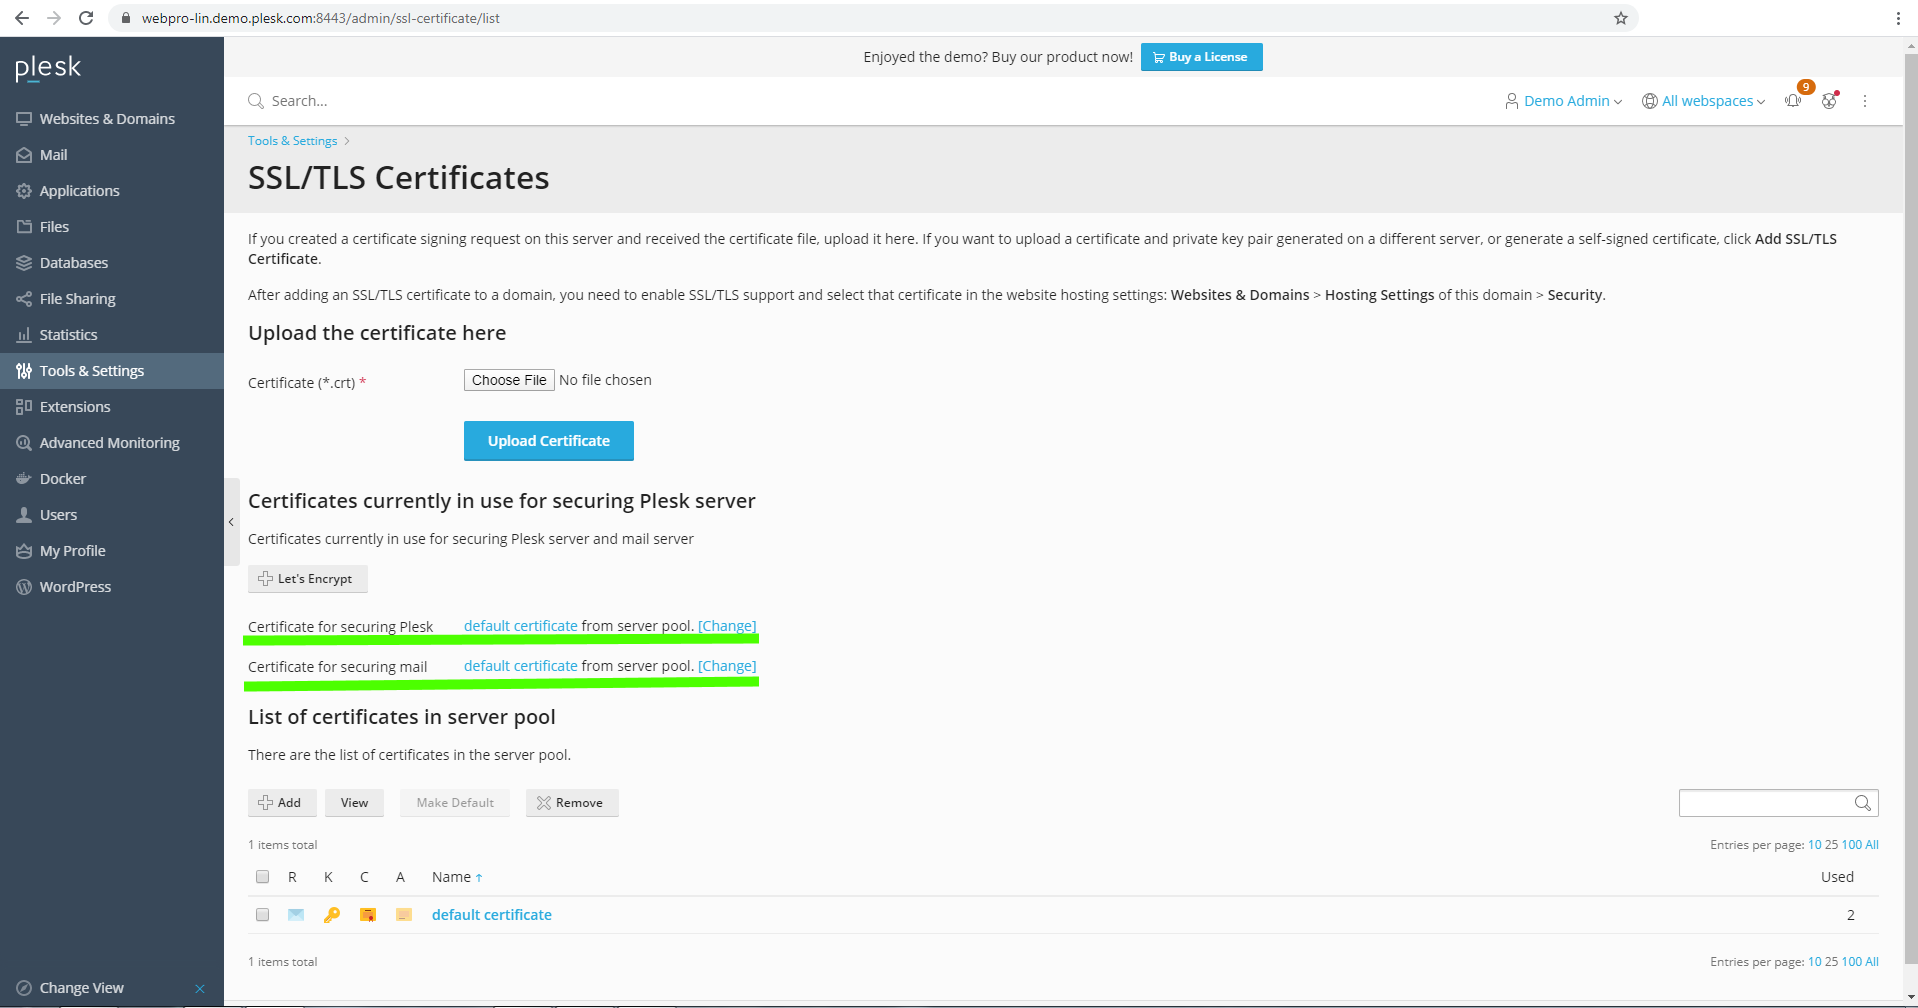
Keep in mind that these are two independent services that can be secured separately.
Then click Change, highlighted in blue to the right of both options, and choose the correct SSL and confirm.
Note: On Plesk Obsidian, you can also secure the mail services directly from the SSL page. Simply mark it and click the Secure mail button:
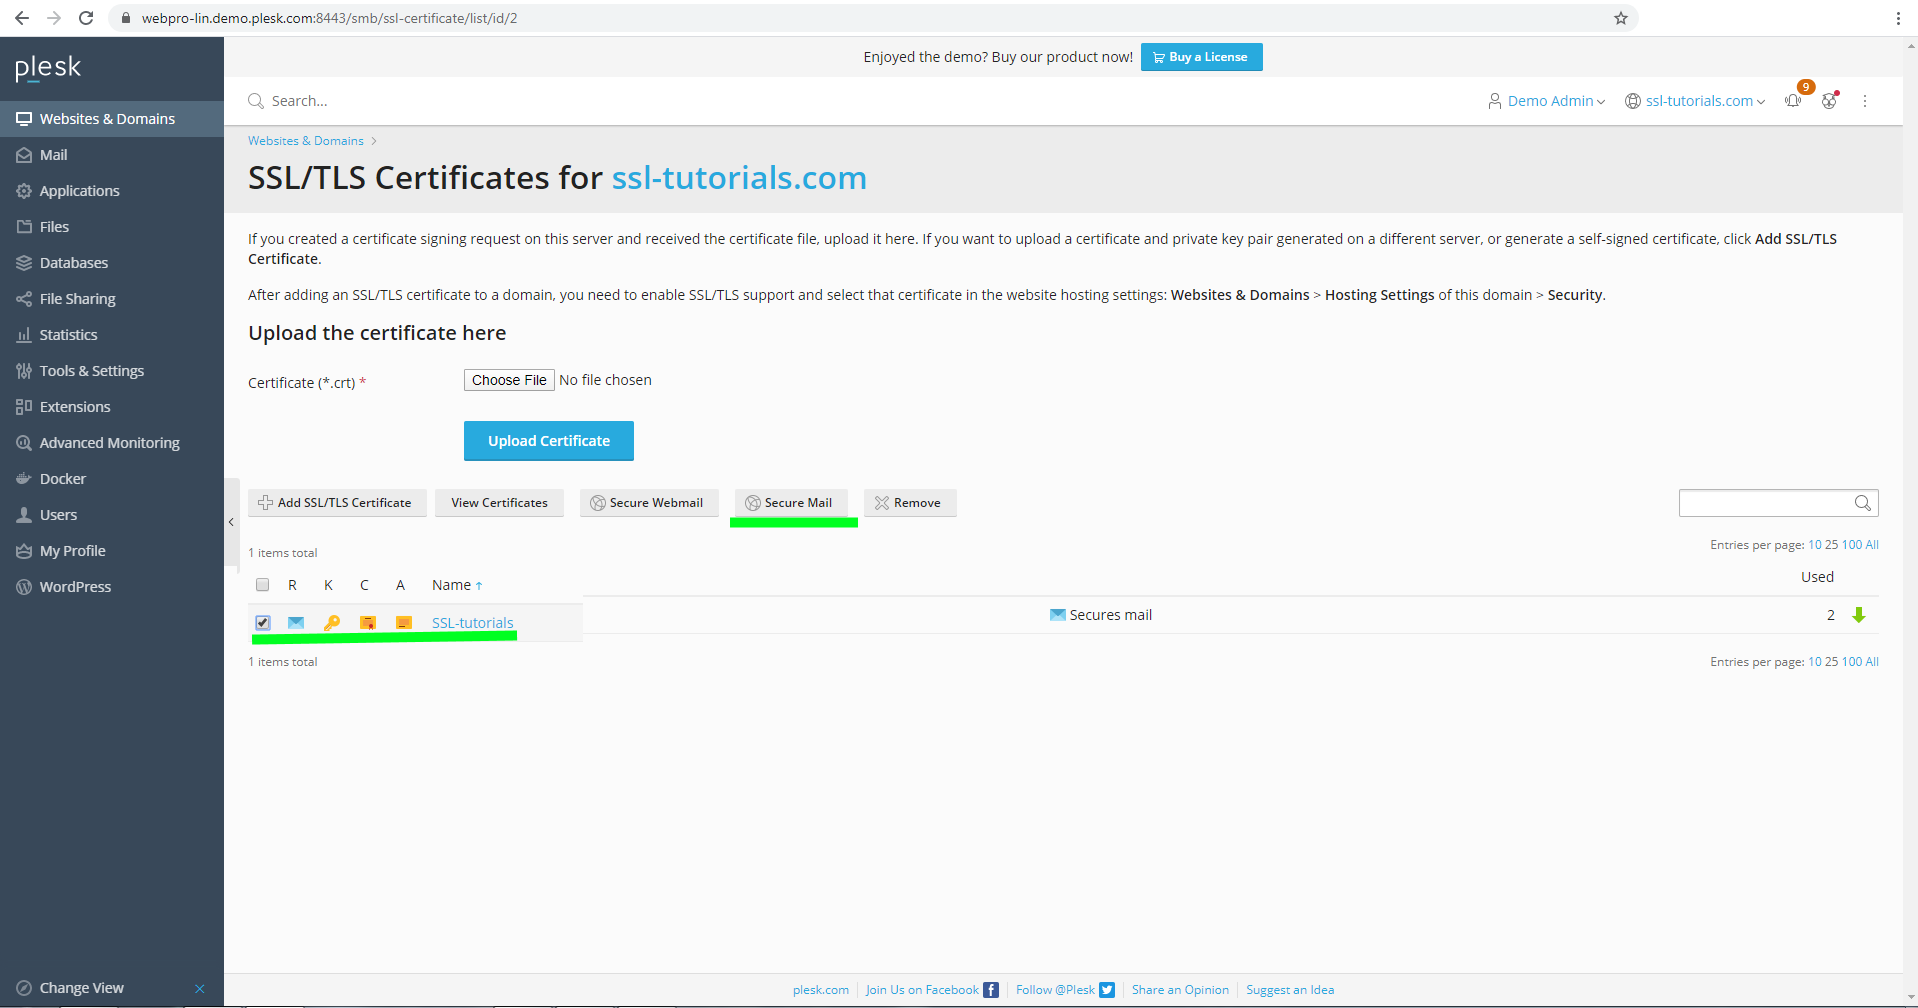
Securing webmail service
Steps 1-5 are the same as described above.
6. Select the Certificate.
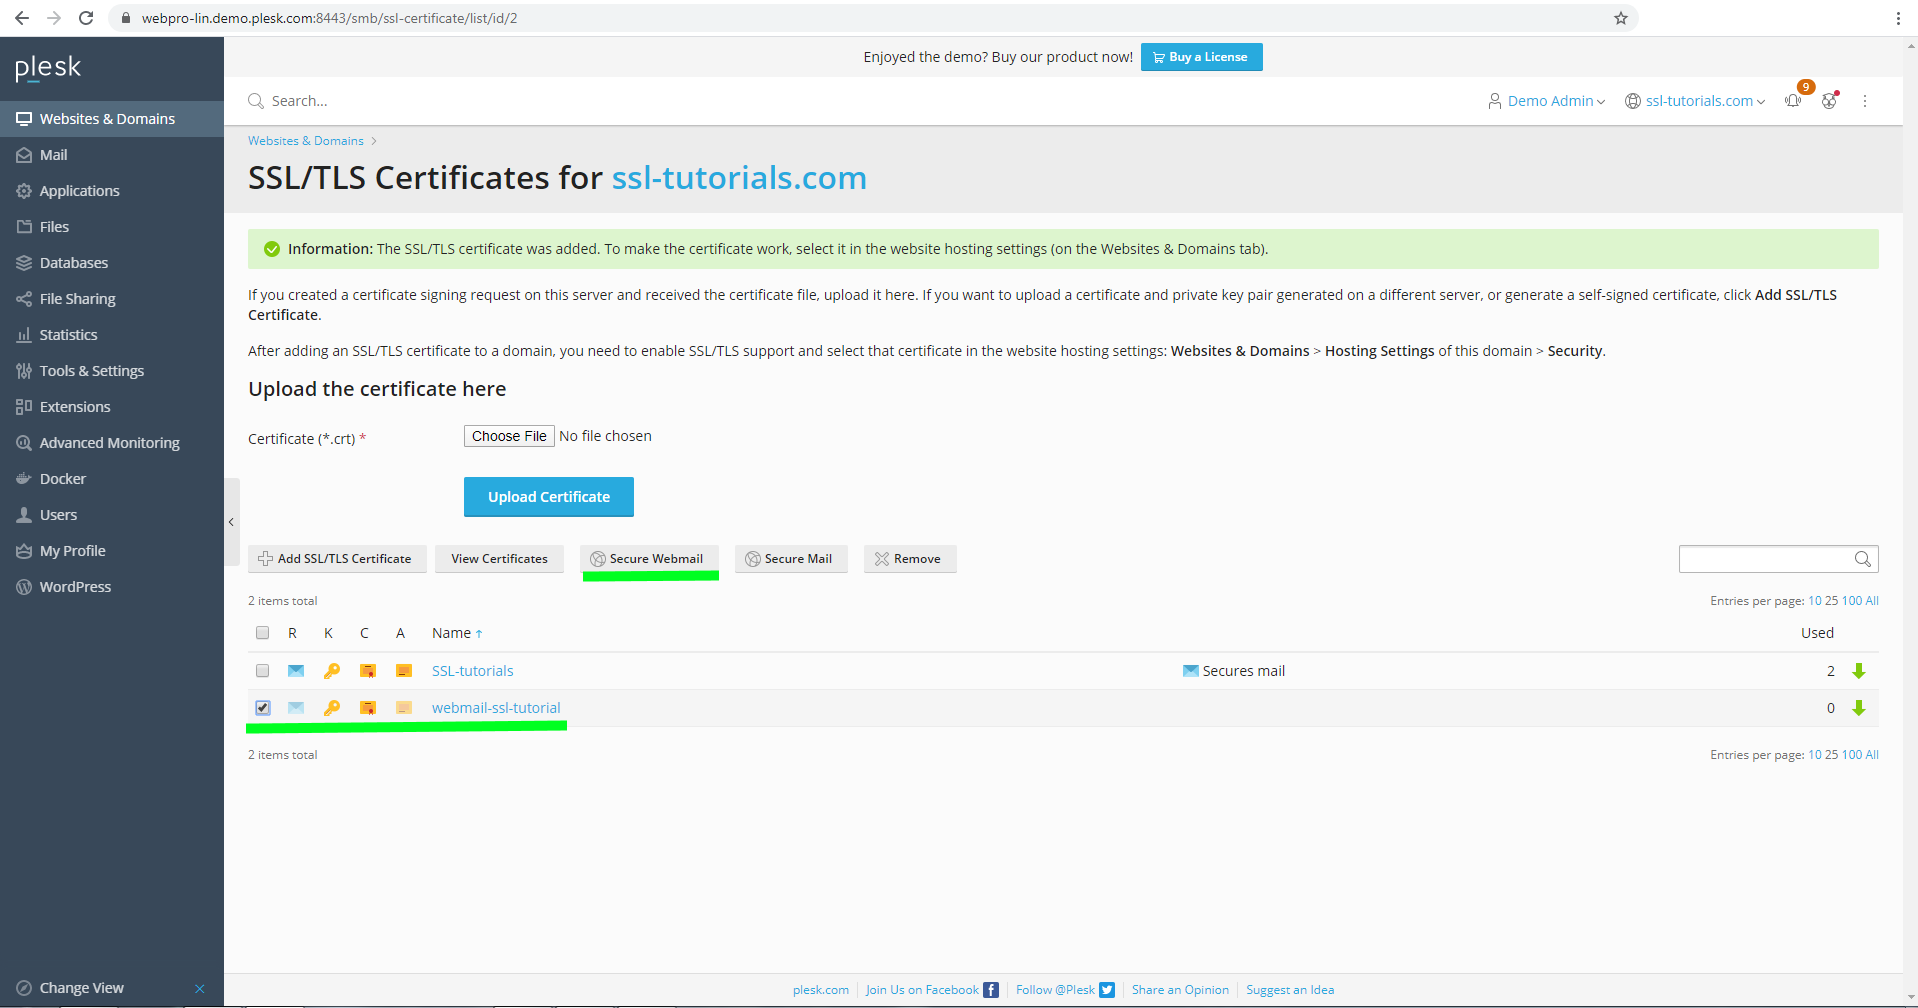
7. Click Secure webmail.

Note: This option is not available on some older versions of Plesk.
That’s it! You can check the result via the link https://webmail.your website.com and typing the specific domain instead of yourwebsite.com.